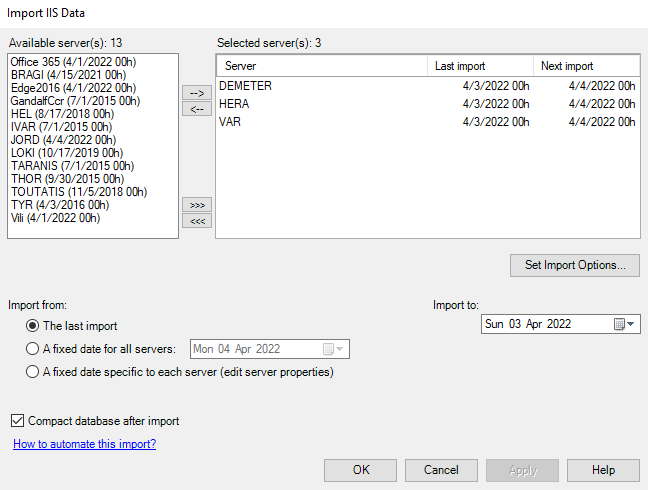
The IIS data source is used to produce reports on OWA and ActiveSync activity. Use this option to import IIS log files into the database.

| Option | Description |
|---|---|
| Only display licensed servers | Select this check box to only display the Exchange servers selected in the Help > License window. |
| Available server(s) | The left pane lists all Exchange servers discovered in the organization. |
| Selected server(s) | The right pane lists Exchange servers selected for IIS log file import. Use the |

|
Use these buttons to change the order in which servers will be handled by the import process. |
|
Import from |
|
| Import to | End date of the period to be imported. This date applies to all selected servers. |
| Compact database after import | Select this check box to compact or shrink the database at the end of the import process. |

|
Use this option to open the Server Properties dialog box for one single server, or to configure import options for an entire group of servers. |
 button on the toolbar.

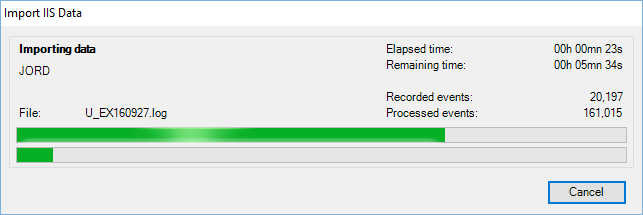
At the end of the process, a summary report is displayed to summarize what has been imported and the errors and warnings that may have occurred.
You can interrupt the import at any time by clicking the Cancel button. Events already completely processed will be kept in the database. However, the last processed file will not be considered as imported, and will not be listed in the import history, until it has been fully imported later on.
You may need to reimport IIS files, for example because an error occurred during the import process. You will have to delete them from the database first.